

- Log in to your Bluehost Account Manager.
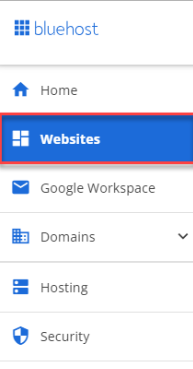
- Click Websites on the left side of the navigation menu and select your website .
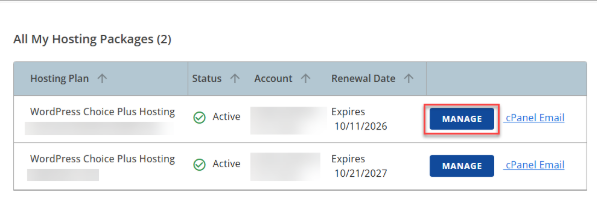
3. Alternatively, you can click on the Hosting tab to easily locate your website. Then, find the hosting package and click the MANAGE button.
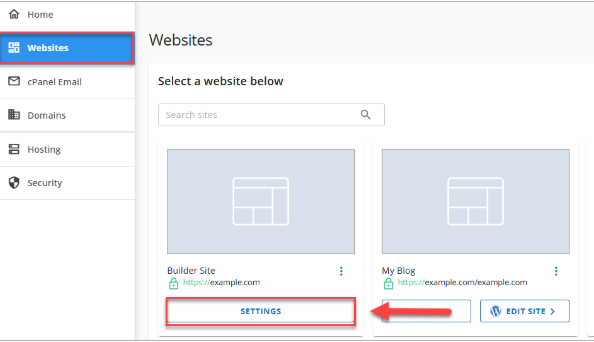
4. On the website management page, click the SETTINGS button.
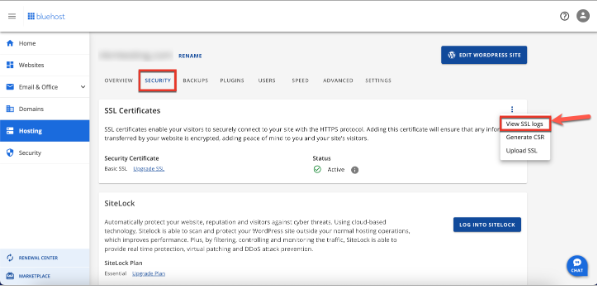
5. Navigate through the menu and click on Security. On SSL certificates, from the right corner, click on the 3 vertical dots and select View SSL logs.
6. Click on the checkbox next to the domain name for which you need to uninstall the SSL certificate. Then, select Exclude Domains from AutoSSL and click View Certificate
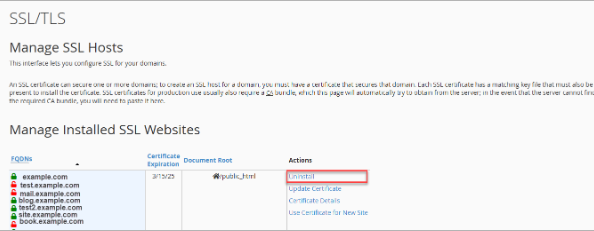
7. Lastly, locate the domain for which you do not want an SSL certificate and click on the Uninstall option.
Summary
To activate a free SSL certificate on your WordPress site, simply log into your hosting account, go to the Security tab, and check if the SSL is active. If not, follow the provided steps or instructions in an email to activate it. This makes your site more secure for visitors. To remove the SSL, just log in, go to Security under Hosting, and uninstall the SSL for the desired domain. This helps keep your site trusted and safe.
You may also refer to their Knowledge Base articles to help answer common questions and guide you through various setup, configuration, and troubleshooting steps.
If you need further assistance, feel free to contact bluehost via Chat or Phone:
- Chat Support – While on our website, you should see a CHAT bubble in the bottom right-hand corner of the page. Click anywhere on the bubble to begin a chat session.
- Phone Support –
- US: 888-401-4678
- International: +1 801-765-9400
mportant Links